Unity Interface
When starting a Unity game, it is important to have a good understanding of the basics of the "Unity Editor".
To start with Unity game development, you will need to first download and install the Unity engine on your computer. Once you have successfully installed Unity, you will be presented with the default Unity interface.
Now we're going to become familiar with the default unity user interface.. 💻
So this is the default screen layout for unity and it's split into four panels, including the Hierarchy, Scene, Project and Inspector 👇.
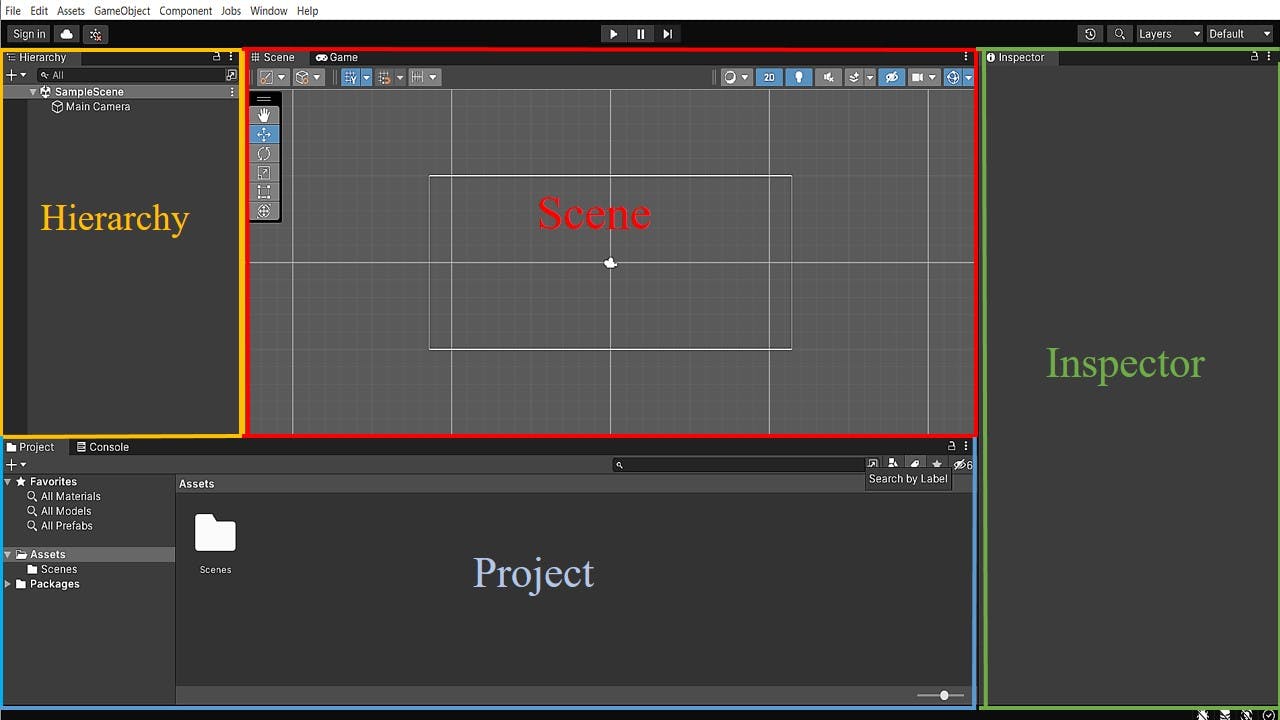
PROJECT PANEL:
This will contain everything that is in our game like
prefabs,sound effects,scripts,tiles,fontsand so on.The top level of the tree structure is the Assets folder, which contains all the assets in your project. You can create new folders within the Assets folder.
You can also import assets into your project by dragging them into the Project panel or by using the
Importbutton in the Assets menu by clickingAssets>ImportPackage>Custom Packagelike so:👇 For ex: Let's create a Prefab folder.
Create a new game object in the scene, or select an existing game object you want to turn into a prefab
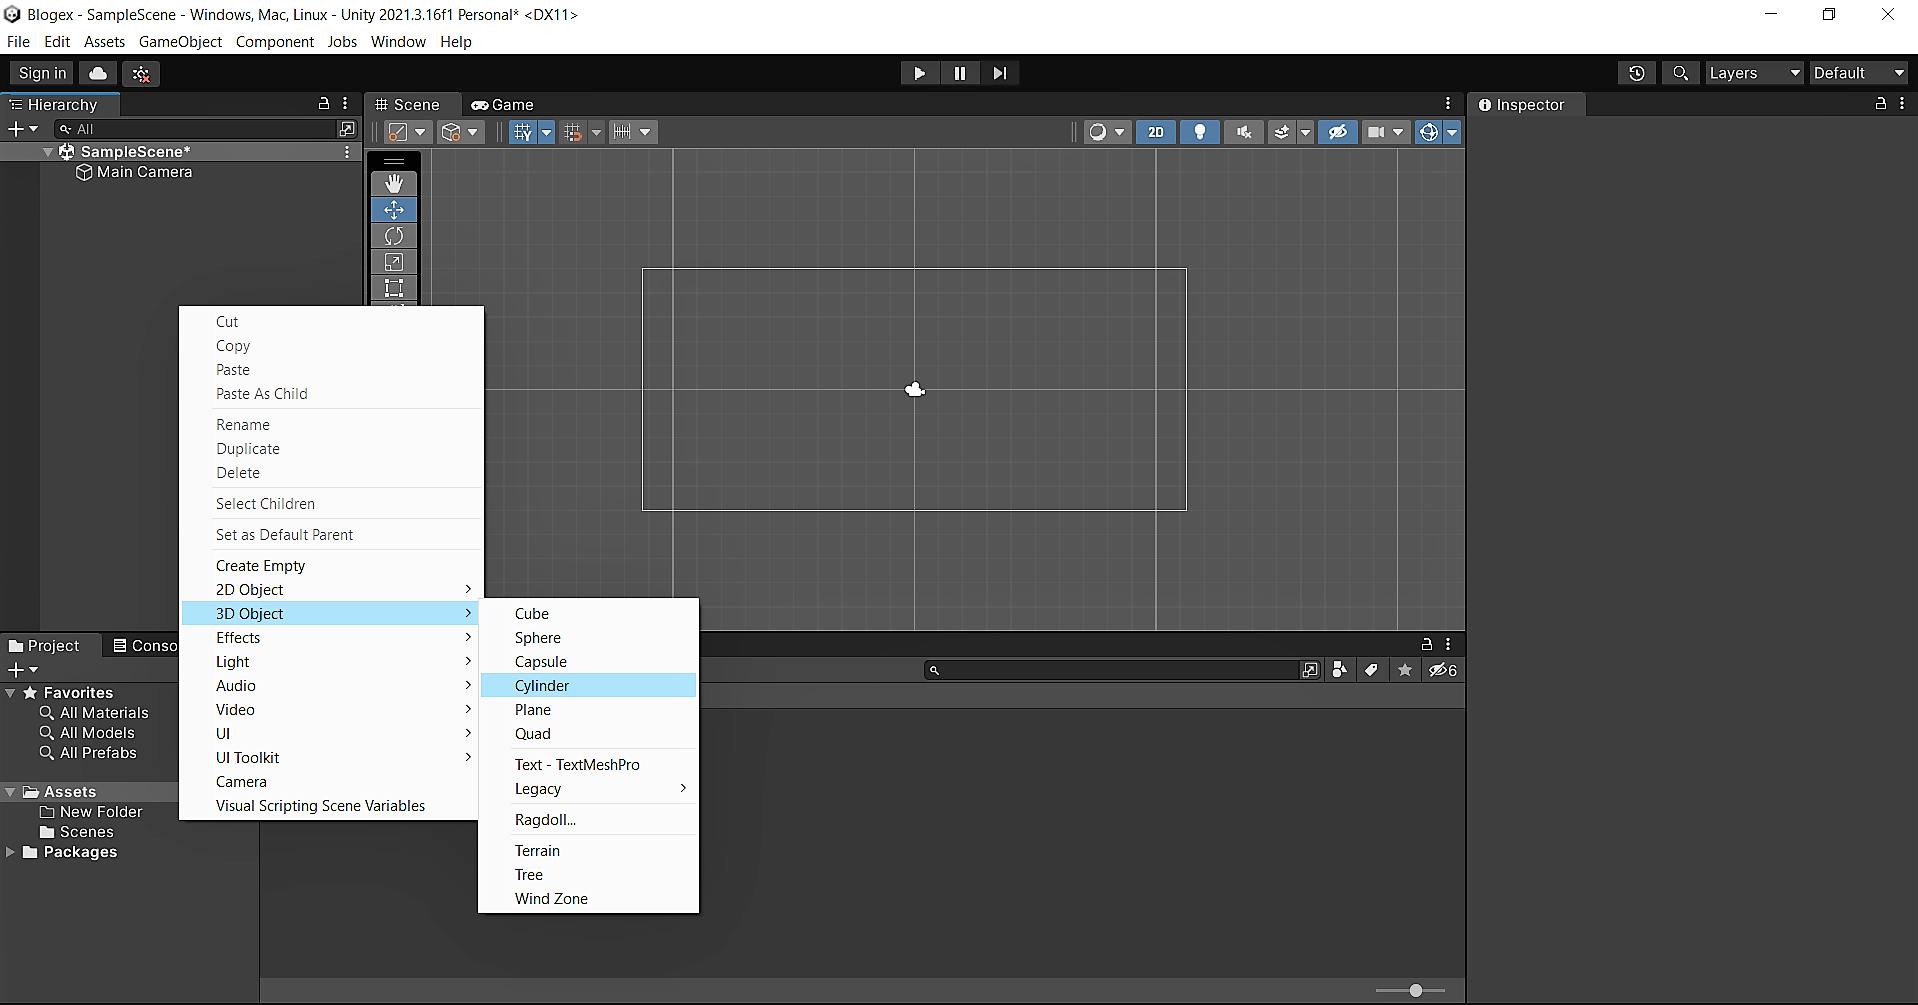
Drag the game object from the Hierarchy panel to the Assets panel to create a prefab asset.
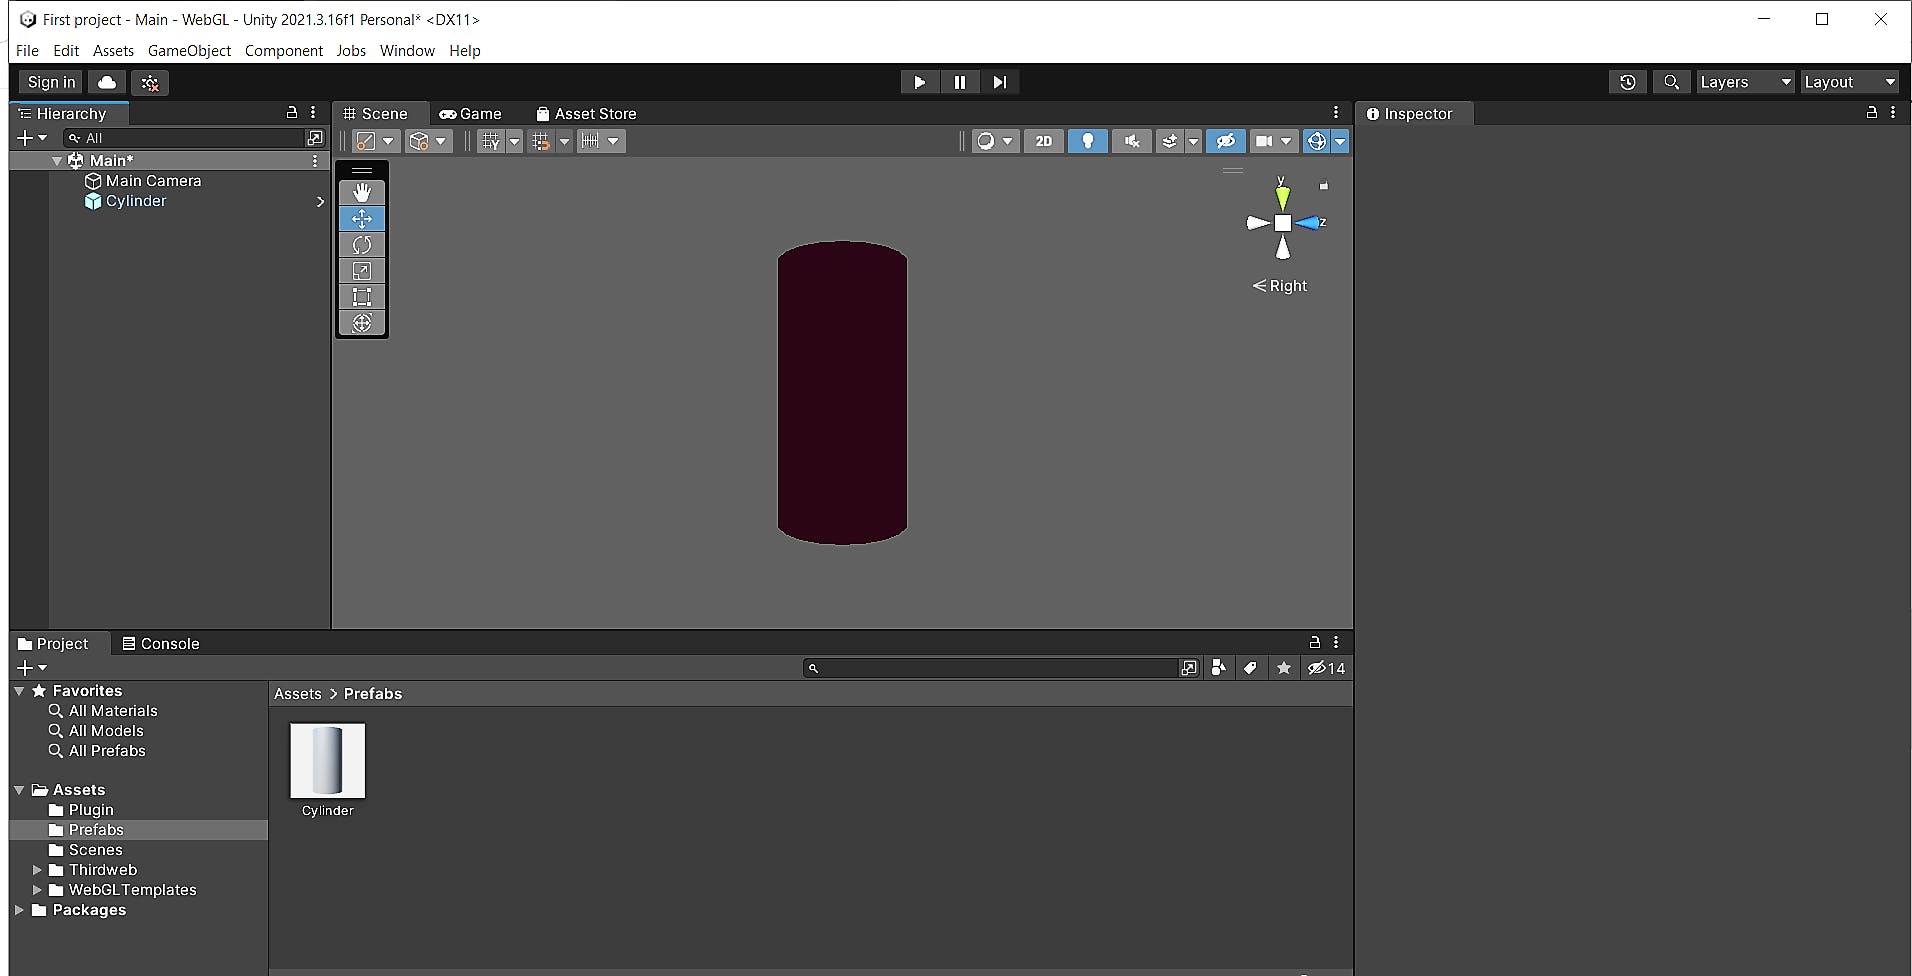
Once you have created and configured a prefab, you can reuse it multiple times in the same scene (Drag and drop it into the Scene). This saves time that would have been spent creating and configuring the same object again and again (Reusability😉).
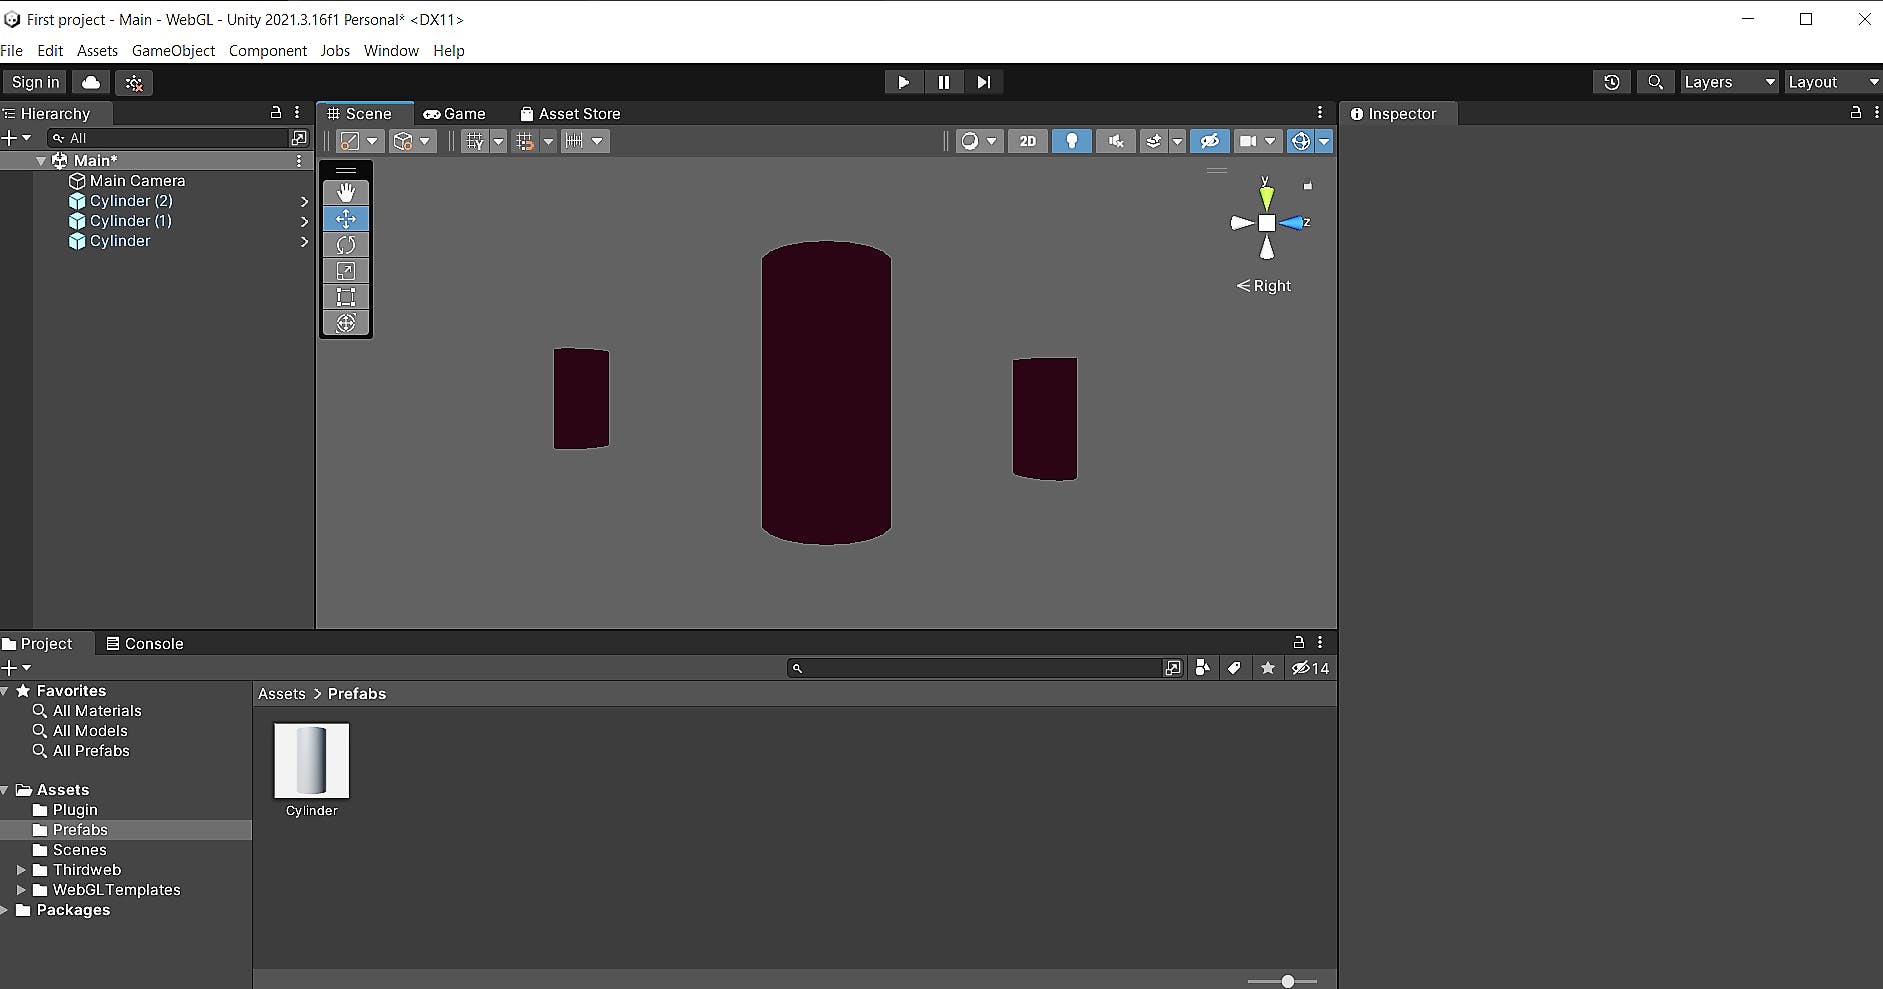
To edit the prefab, double-click the prefab asset in the Assets panel to open it in Prefab mode.
Make the desired changes to the prefab. Any changes you make to the prefab will be applied to all instances of the prefab in the scene.
In the project panel, you can also create new assets, such as scripts and materials, directly within the Unity editor by right-clicking in the Project panel and selecting the appropriate option from the context menu.
The Project panel is also where you can access and edit the settings of your project, such as the
build settingsandplayer settingsby right-clicking on the project name.
HIERARCHY PANEL:
The Hierarchy panel displays a list of all the GameObjects in the scene, organized by
parent-child relationships.You can create new objects in the scene by right-clicking in the Hierarchy panel and selecting "Create Empty" or by selecting "GameObject" from the menu bar and selecting the appropriate option.

You can also select, move, rotate, and scale objects in the scene by clicking on them in the Hierarchy panel and you can also access the properties and components of an object by viewing it in the Inspector panel.
You can also change the parent-child relationship of the objects by dragging one object onto another in the Hierarchy panel. This will make the child object a child of the parent object, meaning that it will inherit the transformations (position, rotation, scale) of the parent object. By changing the parent-child relationships in this way, you can easily manage and organize your game objects and control their behavior and interactions.
Here👇,
Main Cameraacts as the Parent andSphereas the Child.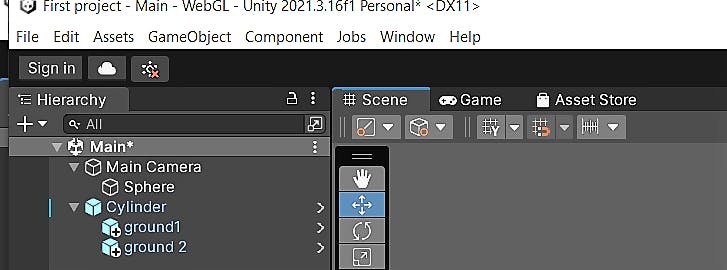
SCENE PANEL:
The Scene panel displays a 3D view of your scene, allowing you to see how your objects are arranged and positioned in the game world.
When you create a new scene in Unity, it is initially empty, and you can add objects to it by dragging and dropping assets from the Assets panel or by creating new objects directly in the Scene panel.
You can also use the Inspector panel to modify the
propertiesandbehaviorsof objects in the scene, and you can use the Hierarchy panel to manage the parent-child relationships of the objects.Additionally, you can use the Scene panel to place, move, and scale objects in your scene and adjust the
viewportandcamera settings.You can see the available
TOOLSin the Scene panel: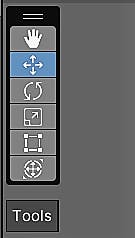
Hand /View tool 🤚: Allows you to pan the view of the scene by clicking and dragging the mouse.
Move tool ←↕→: Allows you to move objects along the X, Y, and Z axis by clicking and dragging the gizmo (The gizmo provides a visual representation of the transformations and movements of objects in your scene, making it easier to manipulate and control your objects).
Rotate tool 🔄: Allows you to rotate objects along the X, Y, and Z axis by clicking and dragging the gizmo.
Scale tool ◱ : Allows you to adjust the size of objects by clicking and dragging the gizmo.
Rect tool 🔳: Allows you to select multiple objects in the scene by clicking and dragging a rectangular area.
Transform tool ◌: It allows you to manipulate the position, rotation, and scale of objects in your Unity scene.
Scene view camera controls: Allows you to adjust the viewport and camera settings, including the camera position, rotation, and field of view.
Overall, the Scene panel is a
powerful toolfor visualizing and manipulating the objects in your game.
INSPECTOR PANEL:
The Inspector panel in Unity is an important part of the Unity Editor that provides a centralized view of the properties and components of a selected GameObject.
It is used to inspect and modify the settings and parameters of objects in your scene. The Inspector panel is updated in real-time as you select different objects, allowing you to easily view and edit their properties.
Here you can see the properties of the GameObject (ground1) in the inspector panel👇.
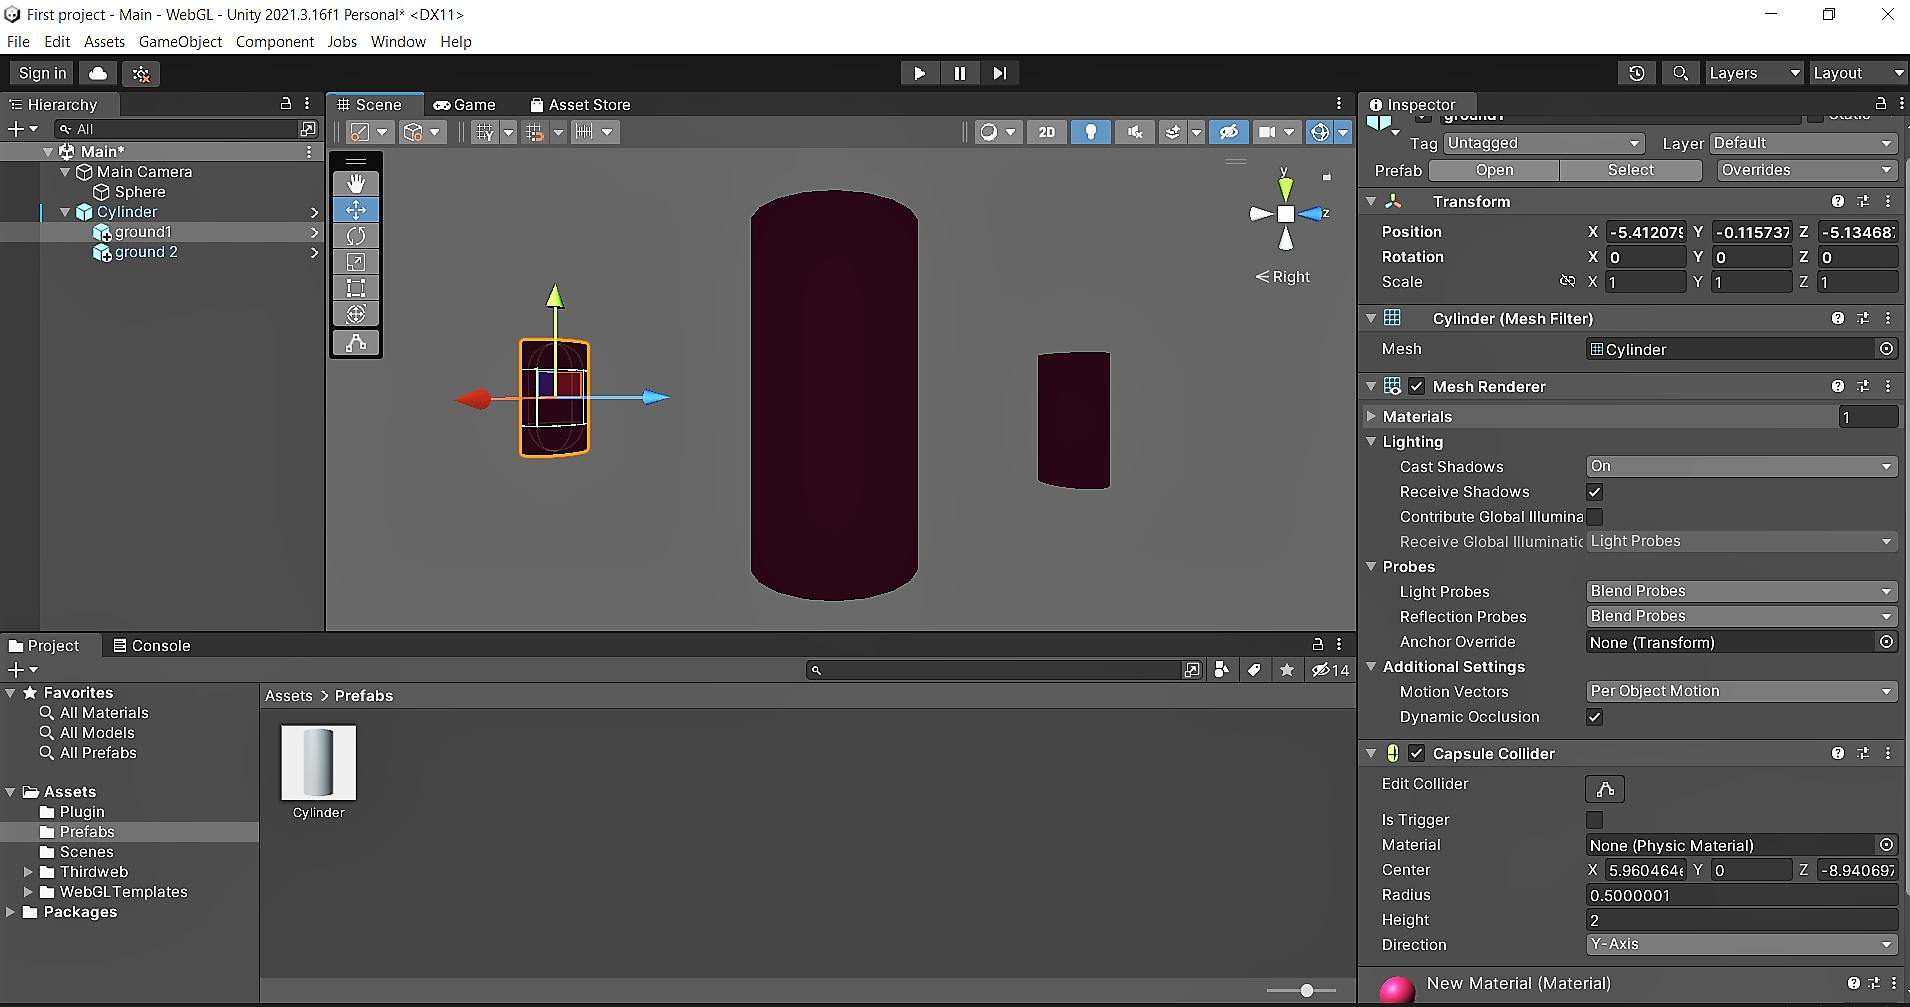
Some of the most common properties you can view and modify in the Inspector panel include:
Transform: This displays the position, rotation, and scale of the selected GameObject. You can use the Inspector to
move,rotate, orresizean object in your scene.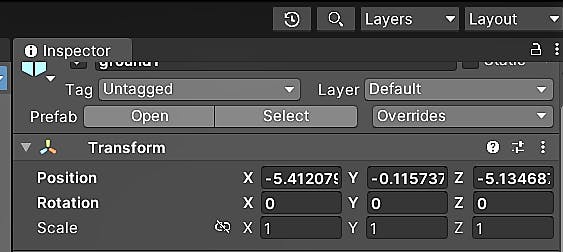
Components: The Inspector panel lists all the components that are attached to the selected GameObject, including
scripts,colliders,renderers,audio sources, and more. You can add, remove, or modify components using the Inspector.
Material Properties: If the selected object has a renderer component, you can view and modify the properties of its materials in the Inspector. You can change the
color,texture, and otherproperties of materialsused by objects in your scene.
Script Properties: If the selected GameObject has a script attached, you can view and modify the public properties of that script in the Inspector. This allows you to fine-tune the behavior of your objects by adjusting the values of variables in your scripts.
The Inspector panel also provides a Preview window, which allows you to view a preview of certain assets, such as textures and audio clips. This can be helpful when working with assets that don't have an associated Scene view, as it allows you to see what they look like without having to run the game.
CONCLUSION:
In conclusion, the four panels in the Unity interface - the Scene view, the Project view, the Hierarchy, and the Inspector - are integral parts of the Unity Editor and provide a powerful way to create and manage the elements of your game. Investing your time and effort to get to know these panels and how to utilize them optimally will greatly improve your experience with Unity and aid in creating exceptional games. Happy Gaming!
Thank you for reading 😊! Until then, gather your ideas and let's get ready to create a game that showcases all the amazing capabilities of Unity. See you in the next blog!
